Create your first JNI Application on Android with the NDK
Like you must know, Java is the default programming language to make applications on Android. However, Java is not always the best solution for making fast apps, especially if you want to make games. A lot of games’ engines are made directly with C/C++. To let developers to make optimized part of codes in C/C++, Google offers the Android Native Development Kit (NDK). The NDK allows developers to write code in C/C++ that compiles to native code. With the NDK, you can make games with better performance on Android devices. In that tutorial, you’re going to learn how to create your first JNI application written in C/C++ on Android with NDK.
1/ Create an Android application
First step is to create a classic Android application on Android Studio. Once your Android project is created, you need to configure Android Studio to download NDK. Go on Menu “Tools” > “Android” > “SDK Manager”, then select the tab “SDK Tools” and check “Android NDK” if it is not checked. Now, Android Studio is going to download the NDK.
2/ Add JNI Build Compatibility to your Android project
Second step is to configure your project to add JNI Build Compatibility. Go on the following URL : http://jcenter.bintray.com/com/android/tools/build/gradle-experimental and find the latest gradle-experimental plugin version. In your Gradle build file, you have to replace the gradle plugin :
classpath 'com.android.tools.build:gradle:2.1.0'
with the latest gradle-experimental plugin :
classpath 'com.android.tools.build:gradle-experimental:0.7.2'
Change to the latest gradle version in your Android project. Select Android Studio “Project” pane, “Gradle Scripts” > “gradle-wrapper.properties (Gradle Version)” and set the following line :
distributionUrl=https\://services.gradle.org/distributions/gradle-2.10-all.zip
Finally, you can finish the configuration by changing your build.gradle file with the following content :
apply plugin: 'com.android.model.application'

model {
 android {
  compileSdkVersion 23
  buildToolsVersion "23.0.3"

  defaultConfig {
   applicationId "com.ssaurel.hellojni"
   minSdkVersion.apiLevel 22
   targetSdkVersion.apiLevel 23
   versionCode 1
   versionName "1.0"
  }

  buildTypes {
   release {
    minifyEnabled false
    proguardFiles.add(file('proguard-android.txt'))
   }
  }
 }
}
3/ Add some JNI Code in your Android Project
Before adding JNI Code in your Android Project, you need to check your NDK Path. Select the menu “File” > “Project Structure” > “SDK Location”. If “Android NDK Location” is not set yet, you have to set your NDK Location.
As we want to use a hello-jni shared lib, we need to configure the build.gradle file of our module by adding the following block under the “buildTypes” block :
ndk {
 moduleName "hello-jni"
}
In your Android App’s MainActivity.java, add your JNI function getMsgFromJni() and System.loadLibrary() call to the end :
// end of the class …

 static {
  System.loadLibrary("hello-jni");
 }

 public native String getMsgFromJni();

} // class MainActivity
Build your project on Android Studio and check all is good after this third step.
4/ Generate C/C++ prototype function for the JNI function
Now, you can generate the C/C++ prototype function for the JNI function getMsgFromJni(). In your MainActivity.java file, the method is highlighted with red because Android Studio could not find its implementation. So, you need to generate its implementation. Select function “getMsgFromJni()” and wait for context aware menu prompt to appear. Click on the red light to bring up the popup menu. Select the following item :
“Create Function Java_com_google_example_helloandroidjni_MainActivity_getMsgFromJni”.
Android Studio has created a prototype function for getMsgFromJNI() in hello-jni.c file under the “jni” folder. The file has the following content :
#include <jni.h>

JNIEXPORT jstring JNICALL
Java_com_google_sample_helloandroidjni_MainActivity_getMsgFromJni(JNIEnv *env, jobject instance) {

// Put your code here :)

 return (*env)->NewStringUTF(env, "Hello From JNI");
}
5/ Use your JNI Code in your Android application
Now, you can use your JNI Code in your Android application. Imagine you have an Activity with a TextView. In your MainActivity.java file, you can display the message sent from the JNI shared library like that :
((TextView) findViewById(R.id.msgView)).setText(getMsgFromJni());
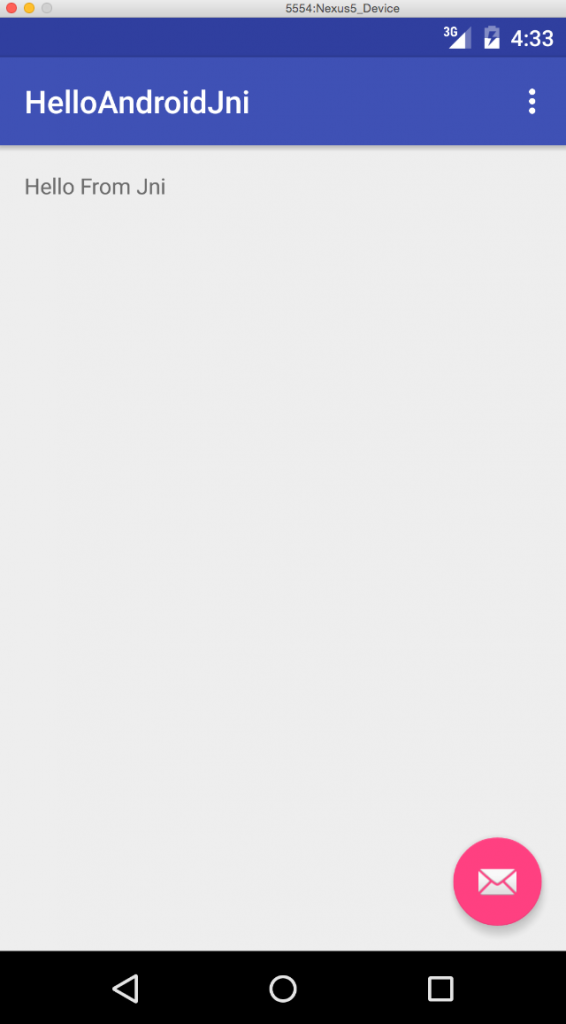
Launch your Android application and you should see the following result :

That’s all for your first JNI application on Android with NDK. Like you imagine, Android NDK is a very powerful library that gives to engine creators a great way to create optimized products to offer to users better experience when they play games on Android devices for example. With some practice, it becomes possible to make native use of OpenGL without too much problems. Give it a try !


Leave a Reply
You must be logged in to post a comment.