Create your first JavaFX 8 Application with Eclipse
Directly integrated in the JDK of Java 8, JavaFX is the new recommended way to create and deliver desktop applications and rich internet applications (RIA) in Java. JavaFX must replace Swing as the standard GUI library for Java SE. However, both technologies will continue to be integrated in the JDK.
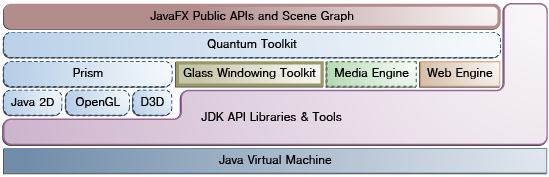
You can have a preview of the JavaFX Architecture in the following diagram :
In that tutorial, you’re going to learn how to create your first JavaFX 8 Application with Eclipse. Obviously, you need to have the JDK 8 and Eclipse installed on your computer before to start this tutorial. Then, you need to create a classic Java Project in Eclipse.
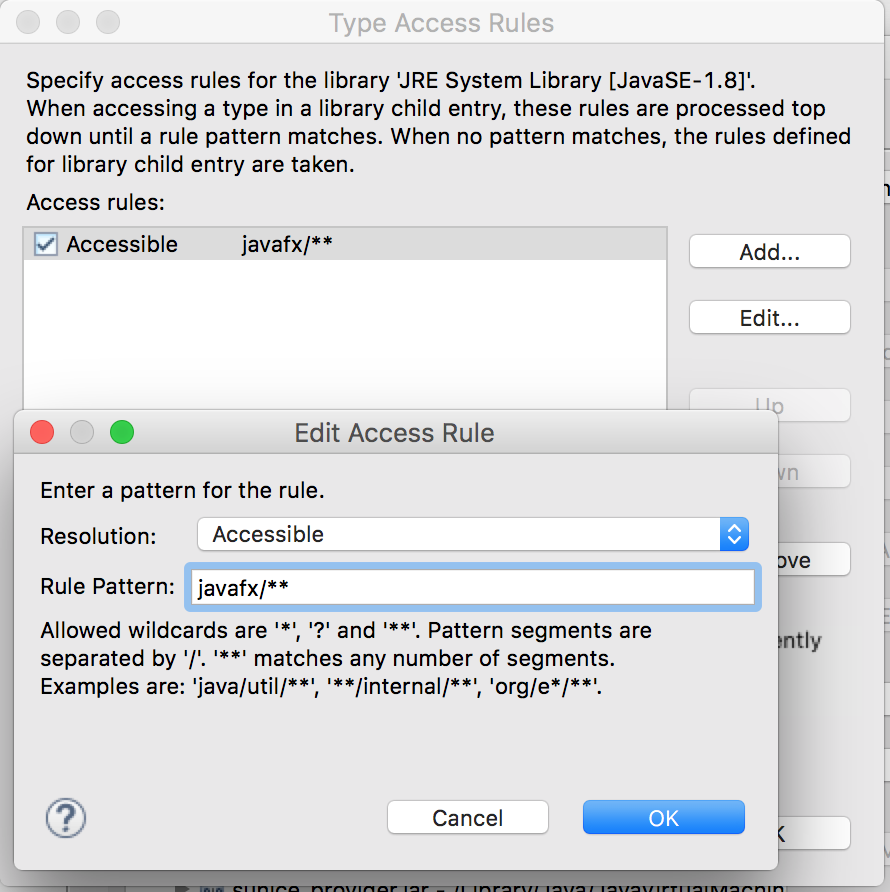
To be able to use JavaFX in your Java project on Eclipse, you need to enable it. Indeed, by default, Eclipse disallows access to classes in jar files in the jre/lib/ext directory, as these are not guaranteed to be available on all platforms. If you are writing a JavaFX 8 Application, you can assume you have jfxrt.jar in the lib/ext directory of your platform.
To enable it on your Eclipse project, go on Properties then Java Build Path. Double-click on your JRE System Library and select Access Rules. Click on Edit on the right menu. Now, you have to create a new Rule with Accessible resolution and the following Rule Pattern : javafx/** . This setting will enable JavaFX packages and classes for your application and will preserve the rule on the ext folder for all other classes.
Now, you can create your main class for your first JavaFX Application. The main class for a JavaFX application must extend the javafx.application.Application class. Then, you must override the start() method that will be the entry point for your JavaFX Application.
The top-level JavaFX container is the JavaFX Stage class that is passed as an argument of the start() method. Then, you need to define a specific Scene that will be setted in your Stage. Finally, you will need to define your views hierarchy and add in the Scene instance.
So, for your first JavaFX application, we’re going to create a window with a simple button on its center. We will add an EventHandler to display a message on the standard output when an user will click on the button. Code will be like that :
package com.ssaurel.javafx;

import javafx.application.Application;
import javafx.scene.Scene;
import javafx.scene.control.Button;
import javafx.scene.layout.StackPane;
import javafx.stage.Stage;

public class HelloWorld extends Application{

  @Override
  public void start(Stage primaryStage) throws Exception {
    Button btn = new Button("Say Hello World");
    btn.setOnAction((e) -> System.out.println("Hello World !"));

    StackPane root = new StackPane();
    root.getChildren().add(btn);

    Scene scene = new Scene(root, 300, 300);
    primaryStage.setTitle("My First Java FX App");
    primaryStage.setScene(scene);
    primaryStage.show();
  }

  public static void main(String[] args) {
    launch(args);
  }
}
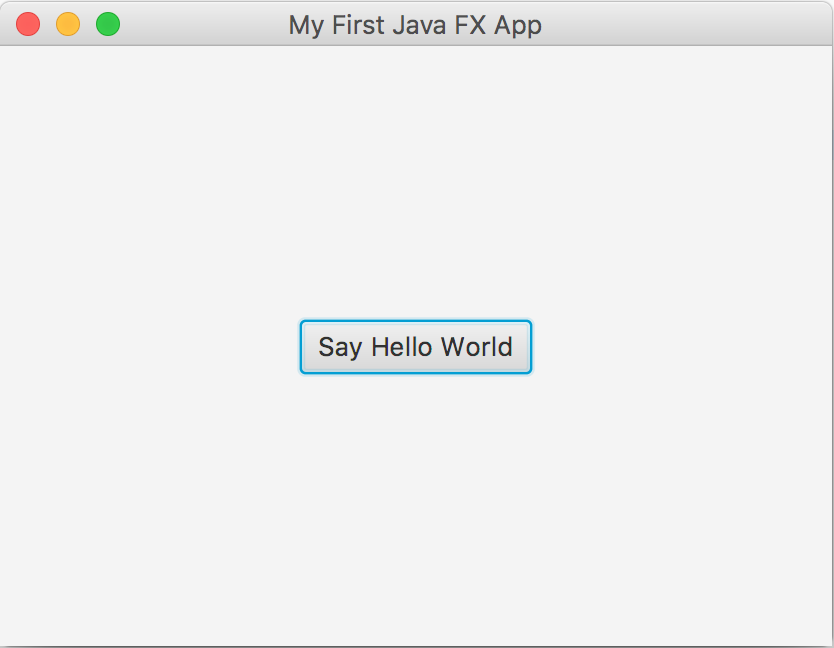
In that code, you can note that you need to call the launch method of the Application class to launch your JavaFX Application from the classic static main method. You can launch your application and you will see the following result :
As a bonus, you can enjoy this tutorial in video on Youtube :


Leave a Reply
You must be logged in to post a comment.